Managing employees on the business account
You can manage employees on the business account from the People section of your dashboard.
To add someone to your business account:
1. Sign in to business.uber.com.
2. Select “People” on the left.
3. Select “Add” to enter all employees’ details being added to the business account and use the format:
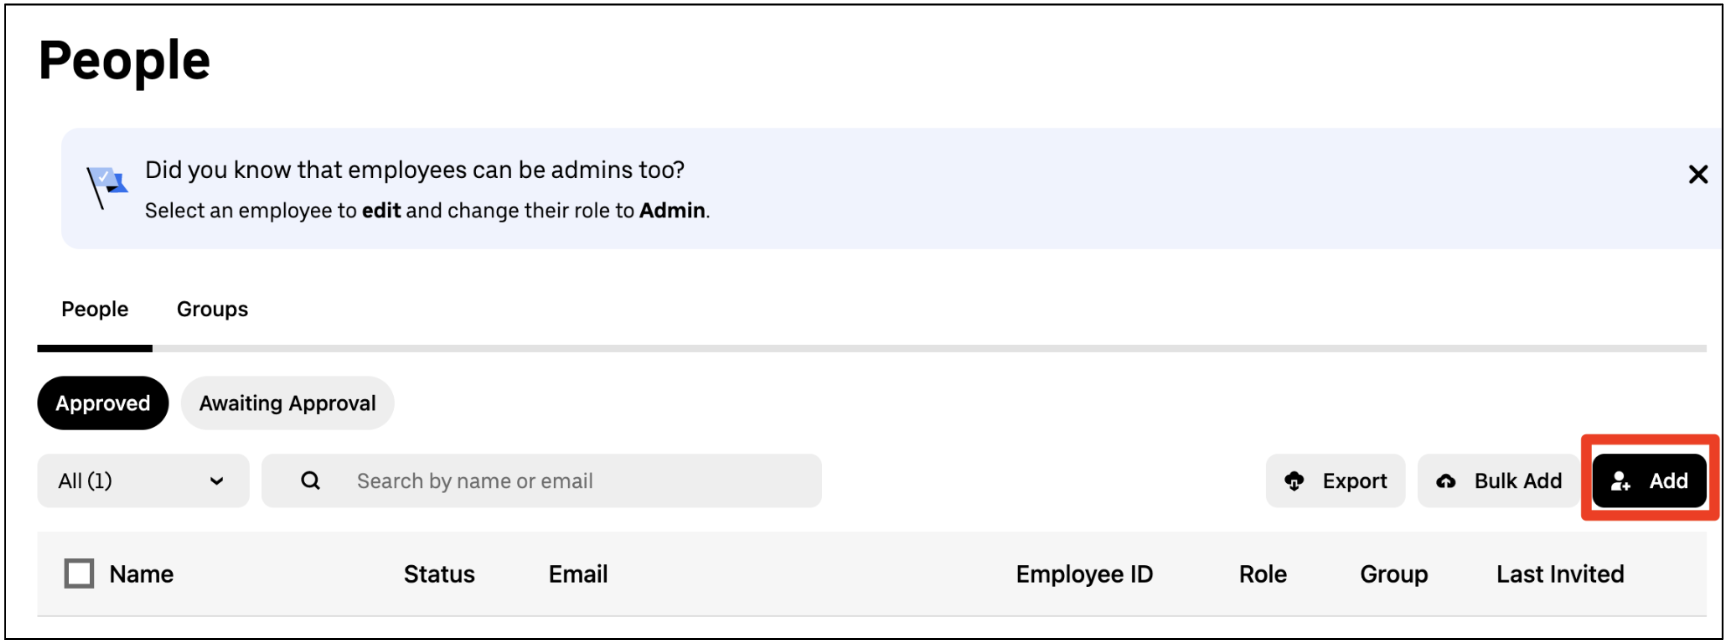
screenshot of the People page with the Add button highlighted
4. Choose the group they should be in or create a new group.

5. Complete the required fields and click “Invite”. - FirstName - LastName - Email - Phone number (Phone numbers are optional and should be preceded by the internal calling code (eg +1 for the US).
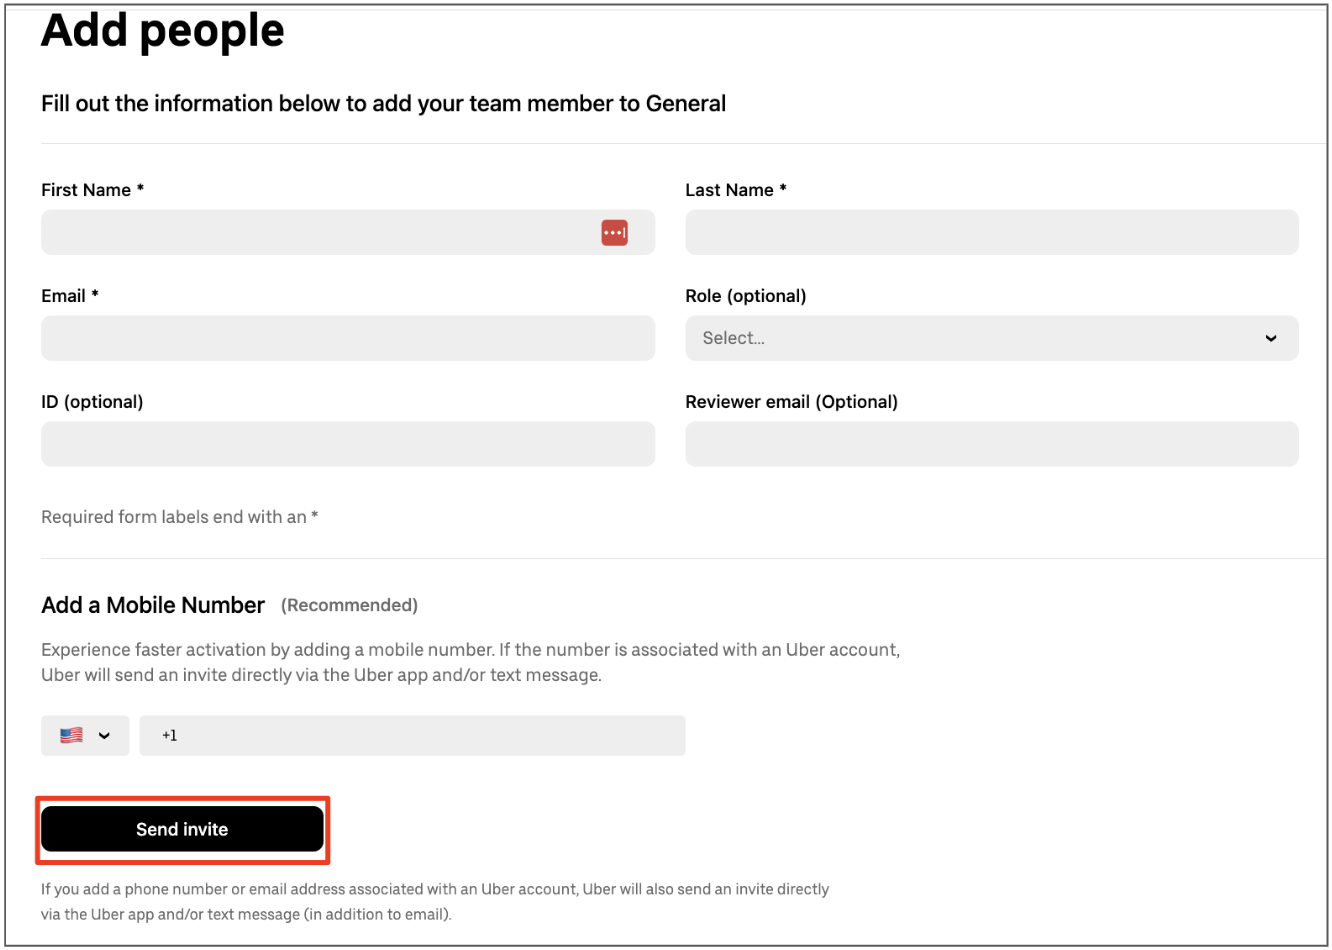
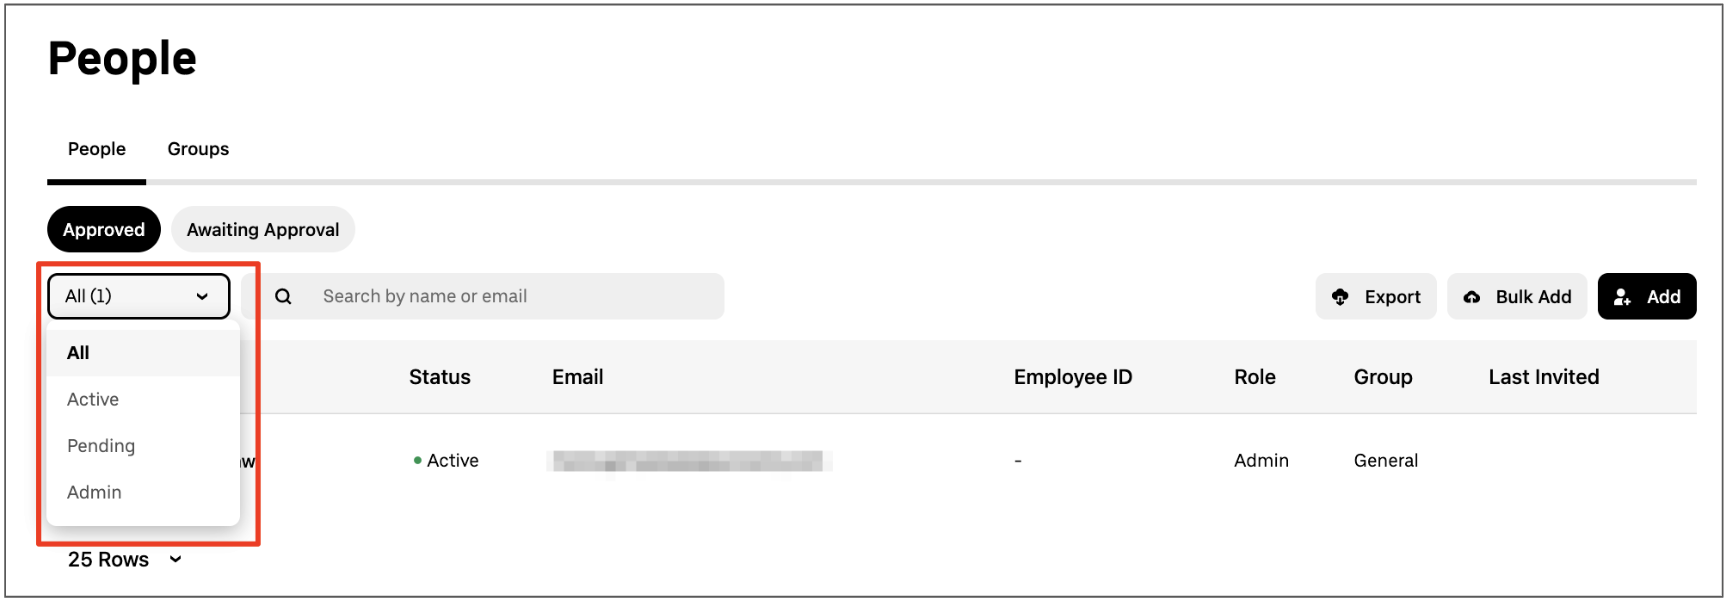
The person you added will receive an email invitation to join the account. You can check employee activation status from the All dropdown on People.
For security reasons, you can only add people with the same email domain (employee@yourcompany.com) as the person who set up your organization’s account.
If you need to invite someone who has an email domain not associated with your company, contact Uber Support to make business account updates.
For Uber Health accounts contact Support based on your region:
- For US Uber Health accounts: support@health.uber.com
- For UK Uber Health accounts: uk-help@health.uber.com
- For Australia/New Zealand Uber Health accounts: anz-help@health.uber.com
To remove someone from your business account:
1. Sign in to business.uber.com.
2. Select “People” on the left.
3. Use the search bar to find the person you want to remove.
4. Check the box next to each person you want to remove (you can select multiple).
5. Click the bin icon to remove the selected employee(s).

To delete someone who has Uber Program Administrator access, you’ll need to remove their admin access before you delete them.
To update someone’s information:
1. Sign in to business.uber.com.
2. Click “People” on the left and select the person you want to edit.
3. Select “Edit” and make the necessary changes in the pop up.
4. Click “Save”.

If you need to change someone’s email address, delete the person and then re-add them.
Updating employee information in bulk
You can add, remove or edit all of the people in your account (including admins and coordinators) in one step by importing an updated CSV file.
To add or remove employees in bulk:
1. Sign in to business.uber.com.
2. Select “People” on the left.
3. Click “Bulk add” and select “Upload CSV”
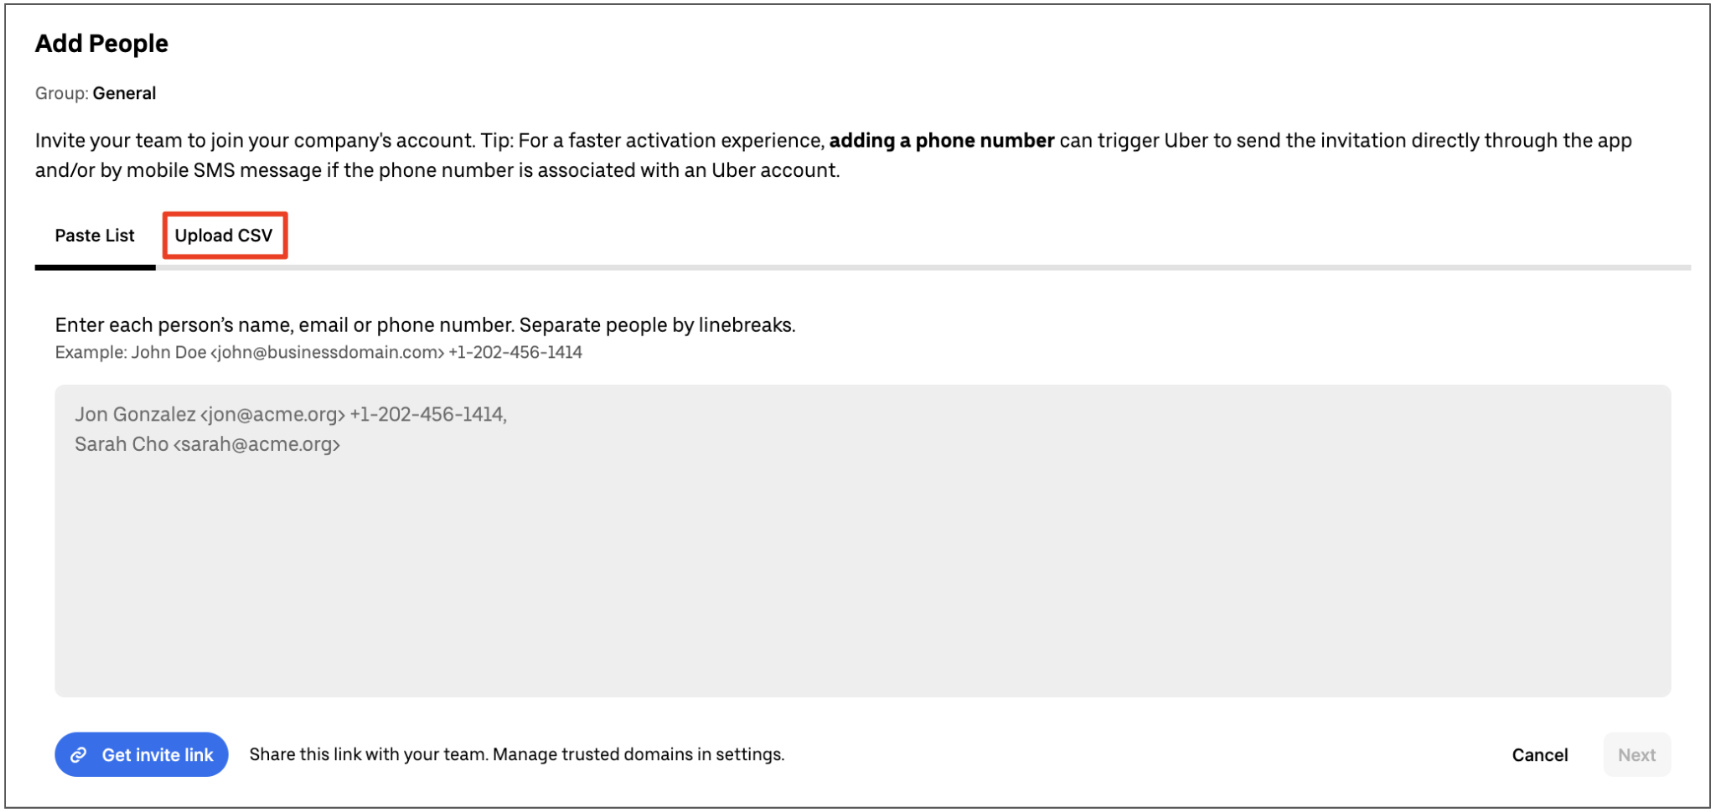
4. Select “Download Template” and list the people you need to add or remove from your account.
5. Save the spreadsheet as a CSV file to your computer.
6. Upload your CSV and select whether you want to add or remove the list from your account.
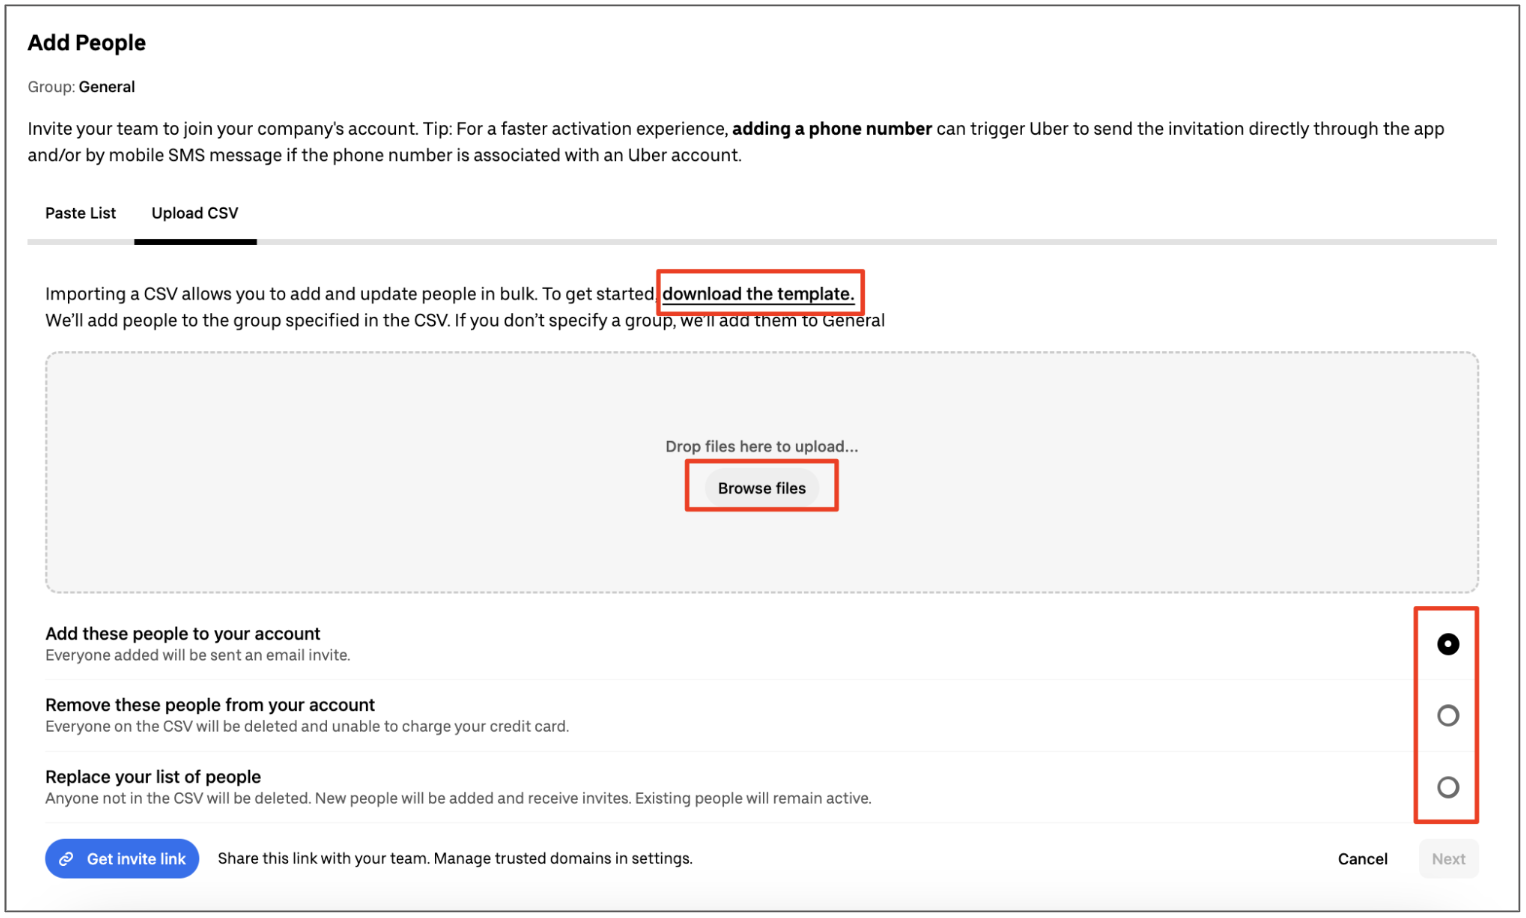
7. Click “Next”. You’ll receive a confirmation email once the change is applied to your list.
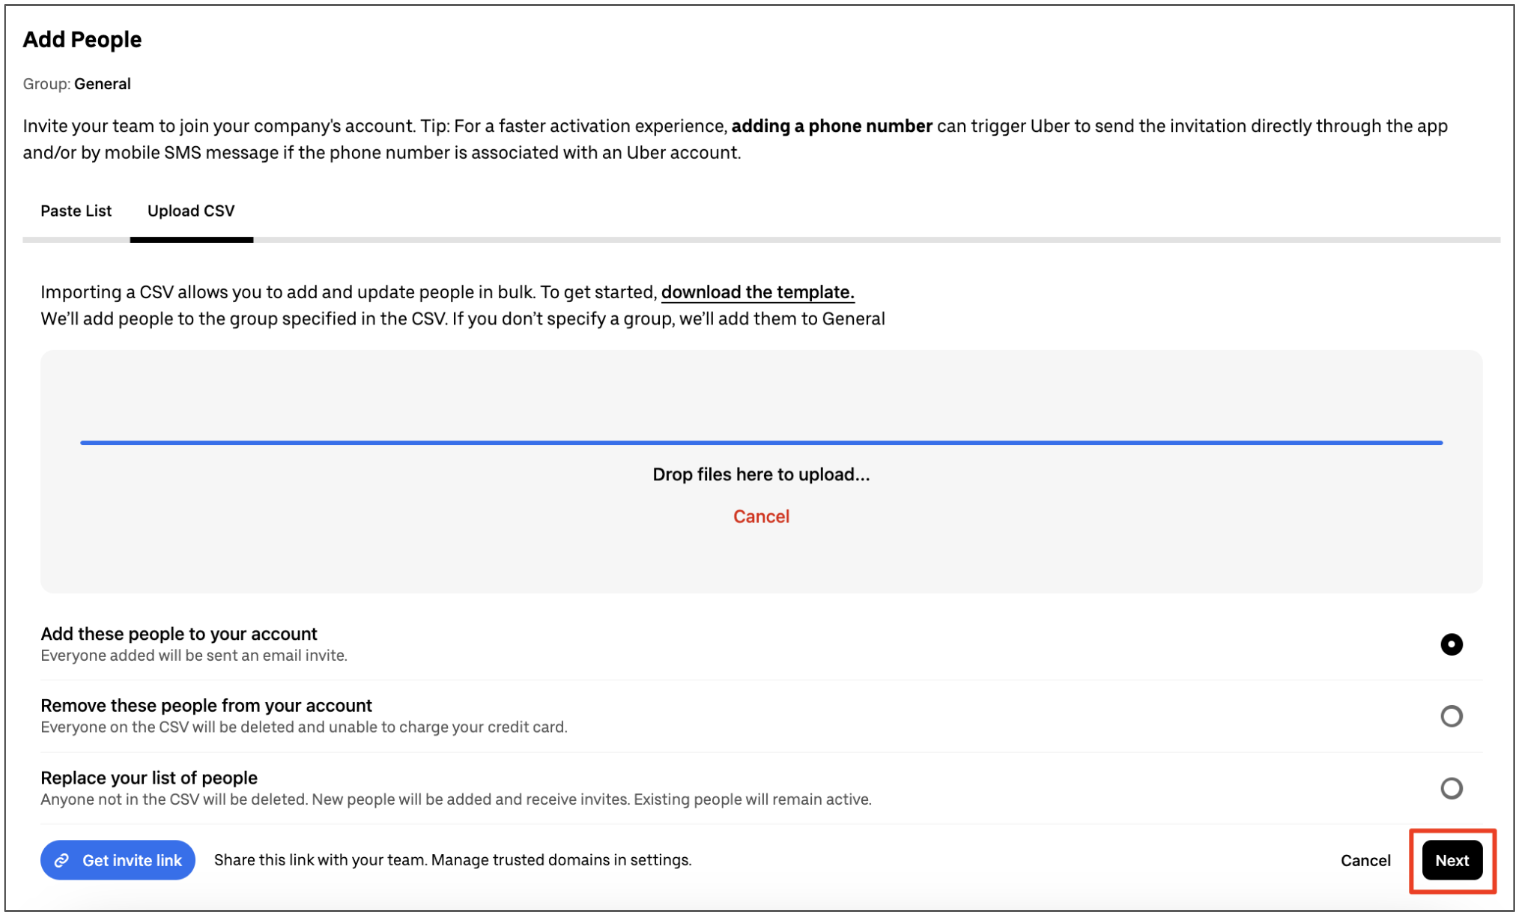
To edit employee information in bulk:
1. Sign in to business.uber.com.
2. Select “People” on the left.
3. Select “Export” to export the employee roster. This will ensure that you’re working from the most recent list of employees.

4. Download the CSV roster when it’s ready (you’ll receive an email).
5. Open the spreadsheet and update the information as needed. You can bulk change: * First name * Last name * ID * Group * Manager reviewer (employee travel programs only)
6. Save the revised CSV to your computer.
7. Return to “People” and click “Add”.
8. Upload your revised CSV roster and click “Next”.
9. Click “Continue” on the next screen to confirm the upload. You’ll receive a confirmation email once the change is applied to your list.
You can’t change email addresses in bulk. If you need to change an email address, delete the person and then re-add them.
How to automate adding and deleting people
You can work with your IT team at your company to set up SFTP data automation for your Uber for Business account.
SFTP, or Secure File Transfer Protocol, is a network protocol that provides completely secure access, transfer, and management of data files programmatically.
This eliminates the need to manually add and delete employees or coordinators as they join or leave your company by integrating with your current employee management systems, such as Workday, Active Directory, or your organization’s HR system.
To set up data automation:
1. Sign in to business.uber.com.
2. Select the profile icon in the top right and click “Settings”.
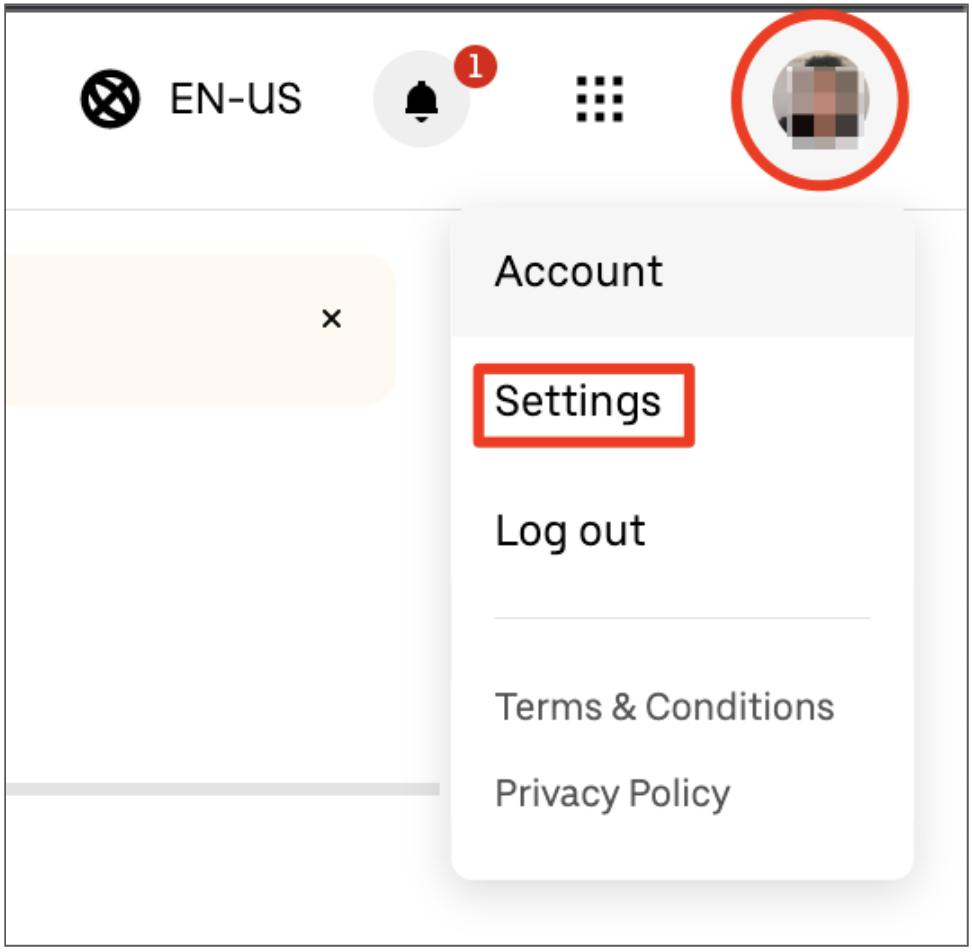
3. Scroll down to “Data Automaton” and click “Set up data automation”.

4. Follow instructions in the “SFTP Setup” pop-up.
You’ll need to make someone on your IT team an admin temporarily to complete this process.
If your company uses SAP Concur, you can sync the roster without SFTP.